Christmas Card Magic: Selective Color in Photoshop/Elements with the Quick Selection Tool

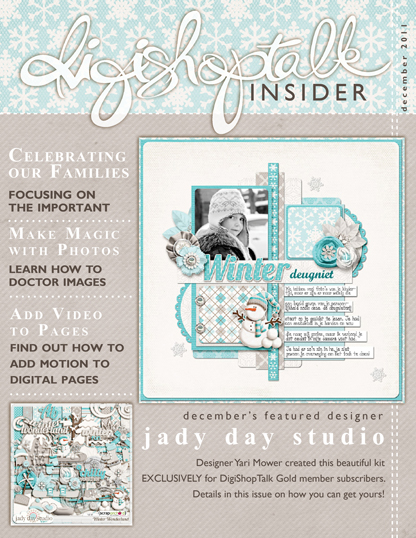
I hope you had a chance to look at Miss B’s tutorials in the December DST Insider!  She has a super-fast way to extract objects from photos using the Quick Selection tool in Photoshop/Photoshop Elements.  While she used her technique to combine parts of two photos into one, I’m going to show you how to use the same technique to create a Christmas card photo  with selectively colored elements like this one I used to design our 2011 family card:

(Look familiar?  Yes, Miss B used my photo in her second tutorial, swapping faces.)

This technique is so quick and easy!  Here’s how:

1.  Open your full-color image in Photoshop/Photoshop Elements.  Decide which parts of your photo you want to remain colored and which parts you want to turn black and white.

2.  Duplicate your photo layer.  Name your original photo “original.”  Rename your duplicate layer “black and white.”

3.  Turn your duplicated photo to black and white.  You can use your software to do this (Image>Adjustments>Black & White) OR you can run a black and white photo action, which is my preferred method. You can find some great black and white photo actions here:

  • Paint the Moon (I love Annie’s gorgeous color actions and freebies.)
  • optikVerve Labs (Download their FREE PS/PSE add-on Virtual Photographer for lots of options.)
  • Pioneer Woman (Yes, she also does PS/PSE actions–her black and white action is gorgeous and free!)

I used an action from My Four Hens to turn my photo from this:

To this:

4.  Put your photo layers in order.  Arrange your photo layers so that the black and white layer is under the original, full-color layer in the Layers palette.

5. Activate the Quick Selection tool.  Now, duplicate your full-color photo again, click on it in the Layers palette and activate the Quick Selection tool.  The Quick Selection tool is nested with the Magic Wand tool and looks like a dotted circle with a paint brush.  You may need to right-click on the Magic Wand tool and then click on the Quick Selection tool icon to use it.

Look at the Quick Selection tool toolbar at the top of your screen (pictured below):  The symbol with the “+” and the brush ADDS to your selection (the area you want to have selectively colored).  The symbol with the “-”  and the brush SUBTRACTS from your selection.  Click on the symbol with the “+.”

6. Use the Quick Selection tool to highlight areas on your photo to remain colored.  With the duplicated original layer selected in the Layers palette, use the Quick Selection tool to “paint” on the areas you want to remain colored by holding down the left mouse button and moving your cursor over the area you want.  Lift up on the mouse button when you want to move the cursor on an area you don’t want to paint.  The area you paint on should start to be surrounded by marching ants (selected).  To remove part of an area from your selection, click on the symbol with the “-”  and paint again while holding down the left mouse button.   If you have a lot of areas you want to remain colored, you may need to repeat steps five to eight for each separate area.

7.  Zoom in very closely (CTL +) to make sure you get all the details.

Switch back and forth from “+” and “-,” painting as needed until the area you want to remain colored is selected to your satisfaction.

8.  Refine the edge of your selection and output it to a layer mask.  Look at the Quick Selection tool toolbar at the top of your screen and find the Refine Edge button. Click on it.

The Refine Edge dialog box will pop up.  Below are the settings I used when I created my image.  Play with them until you are happy.  Make sure you have Output To set to New Layer with Layer Mask.

Click OK.  Your selection will be put into its own layer in the Layers palette with a layer mask showing only the area you want selectively colored.  Turn off your original, full-color layer (click on the eyeball next to it in the Layers palette) and you should see your selectively colored area on top of the black and white layer.

9.  Repeat steps five to eight for each individual area you want selectively colored then adjust any layer masks as needed.  Reduplicate your original layer and use the Quick Selection tool for each separate area you want to remain colored.  I did this six times, once for each red item in my photo.  The beauty of using layer masks is that it is easy to go back and adjust them as needed.  To adjust a layer mask, click on it in the Layers palette and then “paint” on it with black (to remove areas) or white (to reveal areas) using the Brush tool.

10.  Save your work, complete your design and order prints.  After you’re happy with your photo, save it and add any design elements you choose.  I created a bracket shape with a scalloped edge and white beaded stripe plus some word art to finish my card.  I saved my document again as a .psd file once I was happy with the layout.  Finally, I saved my card as a high-quality .jpeg file and uploaded it to one of my favorite online printers, Shutterfly, to order my five-by-seven-inch glossy folded greeting cards.

Easy!  I just love using the Quick Selection tool.  Give it a try and link me up to your project in the comments 🙂

Arise and Shine Forth: 2012 Calendars Parts 2 and 3

Yes! I’ve finished Part 2 and Part 3 of my Arise and Shine Forth 2012 calendars!  You’ll find May, June, July and August in Part 2 and September, October, November and December in Part 3.  I’ve created all of the months in two formats:  full-page and for-binding.  The for-binding calendars have an additional border to allow for binding with a Cerlox, Bind-it-All or other method.  The full-page calendars are perfect for slipping into page protectors or stapling together.  I’ve saved all of my calendar pages in both .jpeg and .pdf formats and they will print out beautifully in color or black-and-white.

Find Part 1 (January, February, March and April) in this post here.

Leave me a comment to let me know how you plan to use these calendars.  I’d love to hear your ideas!

NOTE:  All of these files are zipped and you will need to unzip them for use.

Please, remember: DO NOT to share these files with your friends (or anyone else).  Simply send them to this blog to download their own.  Thanks!

All files are for non-commercial, personal or Church use only!

Arise and Shine Forth Calendars Part 2

May, June, July and August

Download Here.

Arise and Shine Forth Calendars Part 2 (for binding)

May, June, July and August

Download Here.

Arise and Shine Forth Calendars Part 3

September, October, November and December

Download here.

Arise and Shine Forth Calendars Part 3 (for binding)

September, October, November and December

Download here.

Don’t miss these great digital-scrapping resources! The DST Insider and The Daily Digi’s Digital Scrapbooking Manual

I’m excited to share with you one of my ongoing projects, the Digishoptalk Insider. As assistant editor of this FREE digital-scrapbooking ezine, I get a lot of satisfaction putting it together each month with our great staff. The December issue is fresh off the presses and we’ve loaded it with inspiration and information centered around the theme of family.  Even if you’re not a digital scrapbooker, you can find some great ideas inside.

Pop on over and read these great articles:

Plus, we always have a small digital-scrapbook kit freebie for our readers!

My two favorite articles from this issue are some fantastic Photoshop tutorials by my friend Miss Behaving.  A few months ago I participated in Miss Behaving’s Fantasy-style Workshop and I learned sooo much. Can I say I was thrilled when she agreed to share her expertise with the DST Insider’s readers!  Don’t miss her tutorials on how to combine photos and switch faces .  As a bonus, in the next post I will show you how to apply her techniques in another way:  enhancing photos with selective coloring.

If you’re interested in taking one of Miss Behaving’s Photoshop/Photoshop Elements courses, use the coupon in the DST Insider for 15 percent off! The coupon code is on the December DST Insider table of contents page here and expires January 5, 2012.

Not sure about digital scrapbooking, but want to give it a try?  The Daily Digi just released this FREE ebook to get you started.  From collecting supplies to software to making your first layout, this useful book covers everything you need to know to go  digital. Take a peek at this ebook and give digital scrapbooking a try.  You might find yourself addicted to this hobby–I know I am!

Arise and Shine Forth: 2012 Candy Bar Wrapper–a great gift idea!

Here is another great Arise and Shine Forth download for you!  This time, it is a candy bar wrapper.  Simply print, trim and wrap this fun printable around a super-sized candy bar for a quick, easy and delicious birthday, Christmas or New Beginnings gift for your young women.  It is designed to fit 6.8-ounce Symphony bars.  I am also designing wrappers for the standard 1.55-ounce Hershey’s bar as well as for Hershey’s Miniatures.  Watch for later posts with these designs.  Enjoy!

You can download both .jpeg and .pdf files of my candy bar wrapper here.

As always, this download is for non-commercial, personal or Church use only!

Please don’t share my files with others.  Send them here to this blog to download their own copies.

Thanks!

Arise and Shine Forth: 2012 Calendars Part 1 (January, February, March and April)

I am so excited to post the first four months of my 2012 Arise and Shine Forth mutual theme calendars.  I promise to get the rest done soon, so check back here! Each month of my calendars has a unique background featuring a chandelier and damask-patterned calendar grid, and an inspiring scripture that reinforces this year’s theme. Just in case you missed my explanation of the chandelier and how it relates to the theme, check out this postI’ve saved the files in both .jpeg and .pdf format.  You will need to unzip the files after you download them.

These would be great for your Young Women class presidencies and leaders or to pass out to your girls each month–simply add activities, birthdays and other important information to my calendar pages and print, scan and/or copy.  Or, use them as a way to inspire girls to set goals for Personal Progress.  You might even want to create a calendar as a Christmas gift or New Beginnings favor for each girl!  You can slip them into page protectors and put them into inexpensive binders, bind them together using a Cerlox machine (at a copy store) or Zutter Bind-It-All.  Or, just copy and staple.  They print out beautifully in both black and white and color!  Whatever you use these calendars for, I hope they inspire you each month to “Arise and shine forth!”

***Note: I forgot t add an extra day in February for leap year.  I have fixed the error–so sorry–and the downloads are updated. ***

I have two downloads of these calendar pages for you.  One has full-page calendars, the other has an extra one-inch margin at the top of each page to allow for binding.  NOTE:  You can find download links to my Arise and Shine Forth Calendars Part 2 (May, June, July and August) and Part 3 (September, October, November and December) here.

You can download my 2012 Arise and Shine Forth January, February, March and April full-page calendar pages here.

Download the calendars with binding border here.

Please:  Don’t share my files with others.  Simply send them to this blog to download their own.

My calendar pages are for non-commercial personal, home or Church use.

Leave a comment here letting me know how you plan to use this calendar.  I’d love to hear your ideas!

Watch for the remaining months to appear here soon!

It’s a Date! Creating Quick and Easy Calendars with Scripts in Photoshop/Photoshop Elements

Later this week I will post some calendars featuring the 2012 Mutual theme.  They’re not done yet, but I’m excited to share one of my favorite Photoshop tools with you–scripts!  I was introduced to Photoshop/Photoshop Elements scripts by one of my digital-scrapbooking friends, Anna Forrest.  Anna, an amazing scrapper and programmer, creates scripts for PS/PSE that make certain tasks, like generating calendars, a snap.

A script is a mini-program launched within Photoshop/Photoshop Elements that quickly does a repetitious or time-consuming task.  With a few clicks, the task is done and you go on designing.

I LOVE Anna’s Calendar Creator script!  In just seconds, I can build a calendar for any month and year I want and with the fonts I want.  Such a time saver!

Not sure about purchasing a script yet, but want to give one a try?  Anna’s blog, Anna Forrest Designs, has three FREE sample scripts for downloadPlease Note:  the Mini-Calendar Maker Trial Version  generates a very small 2010 calendar with a generic font, but is a great way to see how scripts work.  If you like it, you can contact Anna via Facebook to receive instructions on how to purchase the script.

Here’s how Anna’s calendar-maker script works:

  1. Purchase the calendar-maker script or download the sample script.
  2. Install the script following Anna’s installation instructions for your program (Photoshop or Photoshop Elements).
  3. Open Photoshop.
  4. Navigate to file>scripts and click on AFD Calendar Maker or mini calendar maker trial to run the script.
  5. Once the calendar-maker dialog box comes up, select the month, year, language, heading style, day week begins, paper size, save-to location, and fonts and sizes for the month headings, day headings and grid settings.  Click OK.
  6. Now, just wait.  That’s it!  The script may take a few minutes to run, but once it is done, you will have a full calendar page to use!
  7. Finally, use your creativity to build your calendar page. Customize it with digital-scrapbooking supplies, Photoshop patterns, clip art, etc.  Whatever you want!  Remember to save your file as you go.

Now, I hope you can see why I LOVE scripts for Photoshop!

I’m busily working on some Arise and Shine Forth 2012 calendar printables for you (using Anna’s script, of course!) and hope you enjoy getting a  little sneak peek of my project and the behind-the-scenes look at how I’m making them.

If you get a chance to try one of Anna’s scripts, leave a little note in the comments here and let me know what you think.

And, if you’re too intimidated by scripts, why not use these 2012 Calendar Brushes or 2012 Calendar Templates created by my friend, Wendy.


Quick and Easy Holiday Idea: Christmas Word Art For Cards, Decorating or Gift Giving

With December approaching rapidly, it’s time to think about gift giving and Christmas cards.  We snapped our family Christmas card photo last week and now I’m busily turning it into custom-designed cards to send to friends and family.  This year I wanted to use the hot trend of subway art in my design and built a couple of different pieces of word art for our cards.  Today I’m sharing with you one piece of my subway-style Christmas word art!

The scripture I used always reminds me of Handel’s Messiah and while I was making the word art, I couldn’t help but sing that beautiful piece of music in my mind.  Whether you use my word art on your holiday greetings, print, frame and give to a friend or use for a scrapbook page or wall decoration, I hope it brings the true meaning of Christmas to your mind.

The Christmas word-art files I have for you today are:

One white word-art .png (As with all .pngs, it is just the word art, no black background.  I had to put the black background there so you could see it on this web page 🙂 .)  
 One black word-art .png  
 One 8-by-10-inch .jpeg with white word art and green background  
 One 8-by-10-inch .jpeg with black word art and green background  
 One 8-by-10-inch .jpeg with white word art and red background  
 One 8-by-10-inch .jpeg with black word art and red background  
 One 8-by-10-inch .jpeg with black word art and white background  

They are all saved as high-quality files, ready for uploading and printing as photos or using in your own projects!  For an inexpensive yet impressive gift or holiday decoration, simply upload one of the .jpeg files to your favorite photo processor and have it printed as an eight-by-ten-inch photo.  Then, frame it and display or give!  Easy!

Download my Christmas Word Art 1 files here.

Remember, my files are for non-commercial, personal or church use only!

And please, don’t share these files with others.  Send them here to my blog to get their own.  Thanks!

I’d love to see what you do with this word art, so leave a little note in the comments 🙂

Arise and Shine Forth: Posters

I want to express my thanks to Melanie at Sugardoodle.net for posting my 2012 Arise and Shine Forth word art and welcome all of you who found my blog from there as well as all of you who found me through Facebook.  Thanks for showing such kind interest in my work!

Here is the next in my series of Arise and Shine Forth designs:  Posters.  I’ve created them in four sizes:

8-by-10 inches:  For printing as binder cover sheets or to put in an 8-by-10-inch frame.

8-by-10.5 inches:  Also for binder covers and for printing on home printers, but not uploading as a photo.

11-by-17 inches:  Large enough for a table display.

16-by-20 inches:  The perfect size for putting on a floor easel.

They are all saved as high-quality .jpeg files and  ready-to-print.  Upload the 8-by-10, 11-by-17 and 16-by-20-inch posters to Costco.com or another photo processor for inexpensive yet professional-looking posters.  When uploading to Costco, make sure you don’t use their fast upload option–you will have a really poor-quality result–go with the full-resolution option instead.  You’ll love the quality of a photo print.  I do!

If you like these posters, but want them in a different color, I’ve also got them in pink, green and yellow–check out this post to download them.

I have also saved the 8-by-10.5-inch poster as a .pdf file–perfect for printing on your home computer.  For best results, I always recommend using photo paper and your printer’s highest-quality setting when printing at home.

You can download the original blue poster files here.

You will need to unzip them before you can use them.

As always, please don’t share these files with your friends. 

Send them to this blog to download their own.

These designs are for non-commercial, personal or Church only.

Thanks again for all of your kind support!  Enjoy!

P.S.  More great designs are coming!

Arise and Shine Forth: New Beginnings Invite

Even though it is the middle of November, we’re planning our New Beginnings evening for the young women in our ward now because January will be here before we know it.  And this year, we’re using the 2012 Mutual theme, Arise and Shine Forth, as our inspiration. We plan on using a chandelier theme as I explained in this previous post and I’ve used my 2012 Mutual theme logos to create an elegant New Beginnings invitation, which I am providing for you to download.

To create your own invitations with my download is easy and inexpensive!  Here’s how:

1. Download and unzip the file.

2. Open up the .jpeg file in any photo-editing program like Photoshop Elements or Photoshop–use it like any photo file.

3.  Add your text to the invitation.  Make sure your text color is white so it will show up on the black background.  DO NOT put any text within 1/4-to-1/2-inch of the edges of the invitation.  Sometimes things get cut off when they’re printed.

4.  Save your file as a very high-quality .jpeg file.  If you don’t save it this way, it won’t print out very well.

5.  Upload the image to your favorite photo processor and have it printed as a 4-by-6-inch photo.  I love to use Shutterfly or Costco.  When uploading, make sure to turn off the “vivid pics” option.  Photo processors often give the photos they print a little color boost and this could change the color of your invite a bit.  I prefer making a test print–uploading the photo and ordering just one.  Then,  I pick up the print and if I am satisfied with the colors and look, I order more.

6. If you don’t want to upload your invite, you can save your file to a jump drive and take it in to your favorite photo-processing store or print your invites at home on your printer as well.  If you are printing at home, use photo paper and your highest-quality print setting for best results.

Some New Beginnings Ideas

After brainstorming a bit, our YW presidency came up with some great decorating ideas to use for our New Beginnings this year.

  • Glass vases of twigs painted white and hung with crystal Christmas tree ornaments tied with blue ribbons.  (I got mine at Tai Pan Trading in Sandy, Utah.)
  • Pale blue table cloths topped with white fabric or table cloths.
  • A large poster of this year’s 2012 Mutual theme logo (which I will post soon for you to download).  After New Beginnings, we’re going to hang it up in the YW room.
  • Large diamond-shaped crystals that dangle from blue ribbons as gifts for each girl.  These will also be hung from the branches in the vases and the girls will be encouraged to hang them in their cars, at their windows, etc.
  • Vanilla cupcakes topped with white frosting and edible glitter or clear sugar crystals.  Blue ribbons can be tied around each cupcake.

I’m sure you have amazing ideas as well!  Please feel free to leave your ideas and suggestions here in the comments!

I hope you enjoy this additional 2012 Mutual Theme project.  And watch this blog for more:  I’m making a 2012 calendar, poster, binder cover, program cover, candy bar wrapper and birthday card for you, too!

Download the 2012 Mutual Theme New Beginnings Invite here.

If you want to use the same font for your information that I used in my word art, you can get it for FREE here.

REMEMBER:  Please don’t share these files with your friends.  Simply direct them here to get their own downloads 🙂

Font Favorites: I Love Fonts! Don’t You?

While browsing through my font collection the other day, I came to the realization that I LOVE fonts!  Okay, I already knew that, but I noticed that I have a LOT of fonts.  A LOT! In fact, I have so many that I have to use The Font Thing to organize all 11,000 of them.  The Font Thing is a free program you can use to view, organize and install/uninstall fonts on you computer.  Because Windows tends to bog down when you have more that 100 or so fonts installed, The Font Thing helps you easily find the font you want, install it when you need it and uninstall it when you don’t.

I want to create some custom word art for my Christmas cards this year and have been scouring my font collection and the internet for eye-catching fonts.  I thought you might be interested in some of my favorite font finds to use for your own projects.  So, here’s a few of my recent font loves (and you can download them all for FREE, too!


 Euphorigenic:  Fun and funky serif font; I used it for my 2012 Mutual theme word art.
   Jellyka Delicious Cake:  I just love all of Nerevan Jellyka’s hand-drawn fonts and this recent addition is no exception.
   Carnival Rimmed:  A fun vintage-style caps-only font that is perfect for subway-style art.
   Matilde:  Elegant and fun, this font is feminine and playful.  As a bonus, it comes with 212 extra symbols and glyphs plus some pretty frames and patterns.  To use the extras, you will need Adobe Illustrator.
   Ultra: A nice, chunky font for bold statements.

Not loving these fonts?  Don’t worry, you can feed your font addiction by browsing for FREE fonts on these sites:

daFont.com

Urbanfonts.com

1001fonts.com

Fontspace.com

Once you’ve downloaded some new fonts, unzip them and save them.  If you want them to be automatically installed when you open a program like Word or Photoshop, you will need to install them according to whatever operating system you use.  Windows users can find instructions here.

If you want to use The Font Thing to install fonts as you need them, create a “Fonts to Install” folder on your desktop and put your new fonts there.  Then, when you want to use them, run The Font Thing and select “browse.”  Navigate to your “Fonts to Install” folder and then install the fonts you want to use.

And, one final note.  BACK UP your fonts!  Save your Windows font folder and your other font files on a back-up drive, CD or other media.  In case of a computer problem, you want to have all of your fabulous fonts at your fingertips so you don’t have to search the web for them again.

Thanks for visiting the blog today!  Happy font hunting!