Photoshop/Photoshop Elements Tutorial: Customizing Photo Invitations with Text

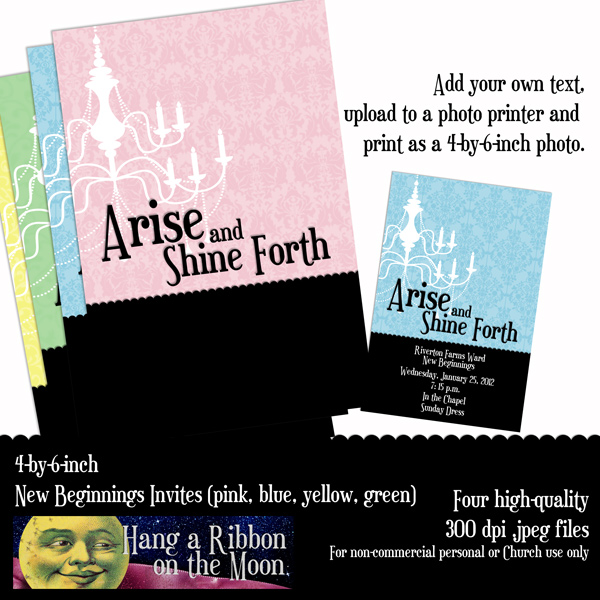
I’ve had some questions about how to customize and add information to my photo invitations.  To help you, I’ve written this tutorial that shows you how easy this can be!  You will need to have Photoshop or Photoshop Elements to follow this tutorial, but you may also be able to adapt the steps to other software programs.  I’m going to use one of my Free Gift photo cards in this tutorial.  If you want to receive this card plus four others, Like Hang a Ribbon on the Moon on Facebook or Follow this blog by email (see right-hand sidebar).  Facebook followers can find the download link by clicking on the Welcome tab on the Facebook page.  Blog Followers will receive the link to the download via email within 48 hours of following.

Ready?  Now, let’s get started!

  • Start Photoshop or Photoshop Elements.
  • Click on File>Open and navigate to the invite .jpeg you want to add text to.  I’m going to use the temple 5×7 invite to create a Young Women in Excellence invitation.  Select the file you want and click Open.
  • Now it’s time to start adding your text.  Click on the Type tool in the toolbar. The Type tool looks like a T.

  •  The Type Tool toolbar will appear at the top of the page, just under the Menu bar.

  • To specify which font you would like to use, click on the first pull-down box on the left.  This is where you will select your font by clicking on the small down arrow and then scrolling until you find your desired font.  For this invitation, I’m going to be using two fonts:  Chocolate Box and Tagettes.  First, I select Chocolate Box from the pull-down. (Note:  If you download these fonts, you will need to unzip the files and then install them before you can use them.  You may need to restart Photoshop/PSE before the newly installed fonts appear in the pull-down.)
  •  Select the size you want your text to be in the Set Font Size box in the Type Toolbar.  It looks like a big T and little T together. There are two ways to set your font size.  You can click on the down arrow and select one of the sizes on the pull-down menu that appears OR you can click inside the box next to the number and enter a numeric value there.  For this size of project, you should not need to enter your own number.  Both the numbers and numerical values you enter refer to the point size of your type.  I am going to select 36 from the pull-down for my first lines of text in my invitation.

  • Now, move your cursor on the image roughly where you want text to appear.  Click and type.  It is a good idea to put each different line or phrase on a separate type layer.  This way, you can move them around easily without having to re-type things.  Don’t worry if your words don’t appear exactly where you want them to be–you will be able to move them around and rearrange them later. 

  • Enter all of your information.  As you enter each line of text on your invitation, a new layer in your layers palette will appear.  NOTE: if you want to put text on a black area of an invitation, be sure to change the color of your text to white (or another color) first by following the next step.

  • To change the color of your text, select the Type tool and highlight the text to be colored by double-clicking on appropriate type layer in the Layers Palette.

  • Then, click on the Select Text Color box that appears in the Type Tool toolbar.

  • This brings up the Select Text Color box.  Use the slider and reposition your cursor and click to change the color.  When you are satisfied, click OK.

  • Now it is time to arrange and finalize your text.  To make changes to a specified layer of text such as size and font, double-click on that layer in the Layers palette.  This will highlight the text to be edited.

  • Make desired changes in the Type Tool toolbar and click the check mark (Commit Any Current Edits) to accept the changes. To reject the changes, simply click on the circle with a line through it (Cancel Any Current Edits).

  • Move text layers around by using the Move tool. Double-click on the desired layer in the Layers Palette, click on the Move tool.

  • Now, move your cursor to the bounding box that appears and click.  Move your cursor inside the bounding box so it turns into an arrowhead and hold down the left mouse button while dragging the text layer to the desired position.  Release the mouse button when you’re satisfied.  Click the check mark to accept the move or the circle with the line to reject the move.

  • Once you’re done editing and arranging your text, save your file. Select File>Save from the File menu at the top.  Navigate to the desired location, RENAME your file and save.  This saves your file as a .psd file, which keeps the layers intact.  Open this file if you need to make changes later.
  • Now, SAVE YOUR FILE AS A HIGH-QUALITY JPEG FILE for printing.  Select File>Save As from the File menu.  Make sure you select jpeg from the pull down menu next to File Type when the Save As box pops up.

  • Type in your file name and navigate to where you want to save it and click save.  A dialog box will pop up that lets you set your .jpeg quality.  Drag the slider all the way to the right to the number 12–this will make sure you get the best print quality.  Click OK and it will save.  Upload the .jpeg to your photo-processing site or take it in to the store for printing.

Easy, right!  If you don’t have Photoshop or Photoshop Elements but want to give these programs a try, Adobe offers free trials–simply download the free trial, install and get going!

And, to get your started, get your free gift from me by liking Hang a Ribbon on the Moon on Facebook or by Following this blog by email (see how in the right-hand sidebar).  Find the download link by clicking Welcome on my FB page or get them by email within 48 hours of following this blog.

Thanks for visiting Hang a Ribbon on the Moon!

Share on FacebookLike this on Facebook

Activity Days: Mom and Me 4×6-inch Photo Invitations

Want an impressive yet inexpensive invitation for your next Activity Days Mom and Me event?  Why not go with my 4×6-inch Photo Invitations?

Here’s how to make these invitations:

  • Download and unzip my Activity Days Mom&Me 4×6-inch Photo Invite file
  • Open the .jpeg file in your photo-editing software (Photoshop, Photoshop Elements, Paint Shop Pro, Gimp, etc)
  • Add your date, time and place and any other pertinent information
  • Save as a highest-quality .jpeg file
  • Upload the .jpeg to your favorite photo-processing website (Costco, Shutterfly, Walgreens, etc.)

That’s it! Easy (and cheap, too)!

Download my Activity Days Mom&Me 4×6-inch Photo Invite here.

Don’t share my files in any way!  Send your friends here to download their own copies.

My files are for non-commercial personal or Church use only!

More Mom&Me printables are coming!  Don’t miss one–follow this blog via email or like Hang a Ribbon on the Moon on Facebook so you won’t miss a post!

Share on FacebookLike this on Facebook

Chandelier Invites: Blank and with 2012 Mutual Theme–All in Four Colors

I received a comment from Heather asking if I could do my New Beginnings Invite in Portuguese or create one without the logo in English so she could do her invites in own in her language.  I was thrilled to do the invite in Portuguese for Heather AND to offer you some variations on the original.

I’ve redesigned my invites with additional backgrounds to the original blue:  pink, green and yellow, which compliment my 2012 Mutual Theme calendars.  Plus, I’ve provided you with a download of my invite in all four colors without the 2012 theme–they are totally without text! Now, you can use these invitations for a whole lot of other occasions:  Young Women in Excellence, Activity Days, Relief Society activities, wedding showers, birthday parties–any occasion you want to create a four-by-six-inch photo-print invite!

Here’s how to customize my blank invitations:

  1. Open the .jpeg file in photo-editing software (Photoshop, Photoshop Elements, Paint Shop Pro, Gimp, etc.)
  2. Add your text.  Note:  If you want to put something on the black area of the invite, be sure you change your text color to white.
  3. Save your file as a high-quality .jpeg file.
  4. Upload your file to your favorite online photo processor.  I prefer Costco.com or Shutterfly.com.  If you use Costco, DO NOT use their quick uploader.  Go with the high-resolution upload, which will take longer, for best printing results.
  5. Order your invitations as four-by-six-inch photo prints.  (So inexpensive!)

You will love the quality of a photo-print invitation and your guests will be impressed, too!

Remember, all of my downloads are for non-commerical personal or Church use, only!

Please, don’t share my files with others.  Simply send them here to download their own.

Thanks so much for visiting Hang a Ribbon on the Moon!

Download my 4-by-6-inch invites WITH 2012 Mutual Theme here.

Download my 4-by-6-inch BLANK invites here.

Download my 4-by-6-inch New Beginnings invite in Portuguese here.

(Please let me know if I misspelled something.)

I have some really exciting projects coming soon!  Don’t miss a post by subscribing to my blog!  I love my followers!

Happy Birthday! Arise and Shine Forth Birthday Cards

To help the Young Women in our ward celebrate their birthdays this year, we’re giving them a handmade bracelet designed to fit with the Arise and Shine Forth Mutual theme. Each bracelet will be presented to the girls in a small gift bag with a custom-designed birthday card slipped inside.  Our YW president asked me to make the cards using my 2012 Mutual theme logos and I thought I would share them with you.

The cards measure 3 3/4-by-2 1/2-inches when folded and have the chandelier logo on the front and the full 2012 Mutual theme scripture on the back.  My .pdf file lets you print four cards per page.

You can add your own greeting or message on the inside of the cards after you print and cut them out, OR, you can print one of two messages I’ve included in the .pdf inside.

If you choose to use one of my greetings, you will need to print on the back of your printed sheet of cards.

Here’s how:

  1. Print out the page of the .pdf with the outsides of the cards on it (page 2). (Make sure you ONLY print page 2.  Click on the printer icon in the Adobe Acrobat toolbar.  Check the circle next to pages and enter the number 2 in the box under print range in the print dialog pop-up.)
  2. Re-insert the printed pages back into your printer, making sure that the blank side will be printed on.  (You may need to do a few test prints to figure out how to put the paper back in so that the inside messages are printed in the right places on the right side of the paper.  I always do this using the lowest-quality setting so that I don’t waste ink.)
  3. Once you’ve re-inserted the pages, print the page of the .pdf with your chosen message. (Page 3 has the “Keep on Shining!” message; Page 4 has the “We love you!” message.) Click on the printer icon in the Adobe Acrobat toolbar. Check the circle next to pages and enter the page number you want to print in the box under print range in the print dialog pop-up.
  4. Cut and fold the cards.

What are you giving your Young Women this year for their birthdays?  We all need ideas, so please leave a comment and/or link!

You can download my birthday card file here.

You will need to unzip the download before you can use it.

Please do not share my files.

Simply direct your friends here to download their own copy.

All downloads are for non-commercial, personal or Church only.  If you have questions about how my files can be used, please click on the “Terms of Use” tab above or contact me.

Thanks for visiting Hang a Ribbon on the Moon!